Wednesday, February 12, 2014

Valentine Crafts

So it's the day before Valentines and you haven't had your kids make anything for Mom or Dad. Have no fear these two crafts are simple quick and cheap. Both are made out of construction paper hearts. I would recommend tracing the shapes for the kids so it remains a heart craft not a random shape craft. The last item is not a craft just an easy idea for dad's to impress the old lady.

 To make a heart wreath from construction paper all you need is some simple household items. As you can see we used yellow and red to add some contrast. Ours was taken to work before the final picture was taken.

Items needed
  • glue
  • paper plate
  • construction paper
Directions
  1. Trace and cut out 10 hearts 
  2. Cut out center of the paper plate
  3. Glue hearts to the paper plates
  4. Cut out a name plate if you want to personalize for mom of dad 
  5. Decorate name plate and glue to wreath
 Heart Mobile


This particular craft was one of my wifes favorites. Now I'm not sure if that's a good thing or not but it was made for her so I'm going to consider it a win. 

Items Needed

  • Contruction Paper
  • Cardboard
  • Ribbon 
  1. Trace and cut out your hearts 
  2. Cut out a circle from cardboard then cut two pieces of construction paper cover the top and bottom.
  3. Glue the top and bottom covers to the cardboard
  4. Punch an even amount of holes around the outside of the cardboard circle 
  5.  Lace the ribbon through holes 2 a time so you will not have to tie the ribbon on top
  6. Punch holes in the hearts and tie onto ribbon. 
  7. Punch hole through the center of the mobile

Dad's Chocolate Strawberries
 
Chocolate covered strawberries are very popular around Valentines. They also happen to be damned expensive. This doesn't have to be the case gentlemen or ladies. Chocolate covered stawberries are one of the simplest things you can make. Almond bark is available at any grocery store in vanilla and chocolate so make your selection based on her tastes. Wash your berries then heat the almond bark according to labeled directions. Dip the berries in the melted bark and then decorate with the kids. These will be much less expensive and the effort of making them will mean much more than picking up the phone and ordering them. I promise these won't disappoint.

Wednesday, January 29, 2014

Little Drummer Boy or Girl

It's might seem utterly absurd for a parent let alone a stay at home parent to actually seek out a noise making toy. That's precisely what we did, the fun is in the making of the drum not necessarily the usage of it. Once again this craft was born from having too much of something and wanting to make use of it before it ended up in the garbage.  Just like our tin can jack-o-lanterns this will use old coffee cans. This was quite a fun little craft and I think it turned out really well


Items Needed
  •  Large Coffee Can
  • Construction Paper
  • Clear Packing Tape
  • Sissors
  • Glue
  • Decorations, glitter, paint, stickers, stamps, ribbon, crayons....

Directions


  • Clean the can and remove label .
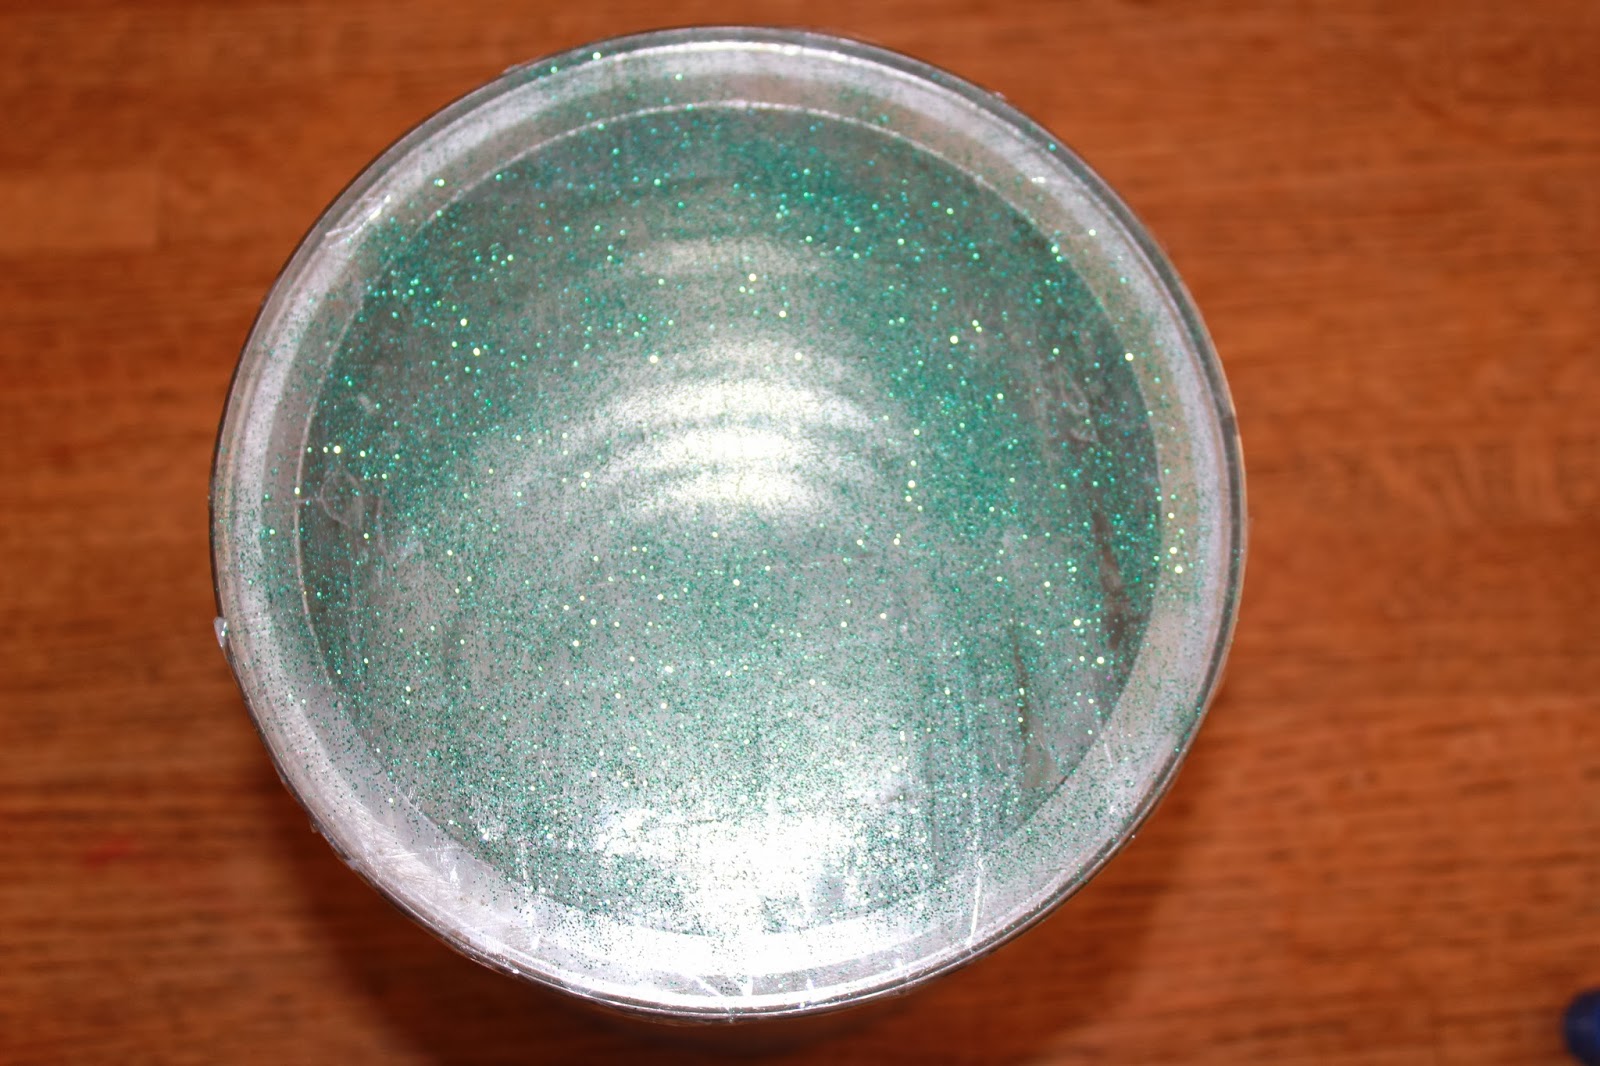
  • Tape the top of the can with opposing layer to ensure complete coverage. Make sure the tape is tight and sealed were overlap occurs.
  • Apply glue to the top of the tape and the glitter .


  •  Allow to dry for several minutes the apply two more opposing layers of tape.
  •  If you would like to add a strap, cut to size the tape to the side of the can.

  • Cut construction paper to appropriate size then glue to the outside of the can. Tape ends if two pieces are needed.
  •  Decorate, we wrote her name in glue then covered in glitter. Stamps, stickers, whatever your child finds fun a will stick to construction paper.

Wednesday, January 15, 2014

Cronan Ranch Regional Trails Park

Tucked in between Hwy 49 and the South Fork of the American River lies a local hiking gem. Cronan Ranch is locate just south of the small town of Pilot Hill in the lower foothills. It is hardly a secret but during the week it can be a quite and peaceful place to spend your day. This is a multi-use trail system so you will have to share with mountain bikes and horses. Or better yet use it on your mountain bike or horse as well.

Wide open spaces, in spring it's all green

The park is more open space than park. Facilities are limited to pit toilets and seasonal porta-potties. Bring water since there is no potable water within miles of the park. Along the trails you will find picnic tables at some choice locations.Cronan Ranch connects to the South Fork American River Trail or SFART. With the connection to the SFART you have almost limitless mileage options for your run, hike or ride. I've done everything from 20+ mile mountain bike rides to 3 mile hikes with toddlers from this trailhead. SFART also connects this area to the Magnolia Ranch trailhead and trails to the south.

Every trail has a nice large sign
Spring time is a fantastic time to explore here. The hills are green , flowers are blooming and the river is flowing high. There are however a few drawbacks to the area. Being in the sierra foothills do not expect a flat hike. Most are fairly gradual while others will test even those of good fitness. Much of the area is not shaded which certainly is a drawback in the summer. Due to the high amount of equestrian usage there is also an abundance of manure. It's a major pet-peeve of mine but needless to say watch your step.

The girls exploring the movie set after lunch
Both the Cronan Ranch Trailhead as well as the Magnolia Ranch Trailheads have good maps of the surrounding trails. The area is very well marked with signs at every trail intersection making navigation very easy. This is a former ranch so the trails are former roads so are mostly graded and very wide  River access is available through several trail down to the water. It is a longer walk than other parks in area so it's not your closest option to get the the American. Long Valley Trail is my daughters favorite trail in the park. It ends at an old movie set and a shady oak tree perfect for picnic. For you next hiking adventure make a day of it and explore Cronan Ranch.

Google Maps Directions from Sacramento


 Via I-80
Via Hwy 50

Additional Information avalible from

http://www.blm.gov/ca/st/en/fo/folsom/cronan.html

http://www.coloma.com/recreation/riverside-parks/cronan-ranch-trails-park/


Tuesday, January 7, 2014

Sweet Cornbread Recipe and Crowded Toy Box relief

 Sweet Cornbread

Winter means chili and soup at our house. What goes with chili better than cornbread? Nothing. This recipe is not only very easy to make but it's really good. I don't fault my parent's too much but for the longest time i thought cornbread was supposed to be dry and rather flavorless. Our go too was like many, the box of Jiffy was cornbread for us. This recipe is not Jiffy it's moist and very flavorful.

You can make this in a standard 9 inch cake pan, a rectangular carousal dish or muffins. Since our little one still drinks whole milk that is all I use for baking.  We have used skim for this recipe in the past and the bread turned out just fine. I also usually use corn oil instead of vegetable oil as I believe it helps the flavor. Like anyone else who blogs about a recipe this is not my original creation it comes from allrecipes.com and the original can be found here corn bread recipe.
You'll never buy Jiffy again

Ingredients

1 Cup All-purpose flour                         3 1/2 Teaspoons  Baking Powder
1 Cup Yellow Cornmeal                        1 Egg
2/3 Cup Sugar                                        1 Cup Milk
1 Teaspoon Salt                                      1/3 cup  Vegetable Oil

Directions
  1. Preheat oven to 400 deg. and grease pan
  2. Mix flour, cornmeal, sugar, salt and baking powder.
  3. Mix in egg, milk and oil 
  4. Mix or whisk until no lumps present then our into pan or muffin tins.
  5. Bake for 20-25min or until a toothpick can be inserted into the middle and come out clean.


 Toy Box relief and Rotation

Now that Christmas has passed and the house is getting back to normal you may have noticed that your kids have a ton of toys. This issue is compounded at our house since both or our children have birthdays right after Christmas. Last year we found ourselves overwhelmed with crap. Their aunts, uncles, grandparents, great grandparents, ext. are exceptionally giving so it is certainly on the good problems list but it did create some issues. The biggest issue we noticed was a lot of toys were not getting played with or ended up forgotten about in the dark depths of the toy box.  The mess was out of hand and clean up time required heavy equipment and qualified as an EPA Superfund Site. Instead of tossing or donating those old toys rotating them was our solution. It's worked great for a year, the kids love it and the toys get used more. A couple of boxes or plastic bins and a little space is all you need to clear some room and get those toys played with.

We have learned a few lessons over the past year that might make your rotation a little smoother and easier than ours. 

  • Split the toys into either 2 or 3 equal parts.
  • Do it while they are sleeping. Nap time is your friend, they had forgotten about that toy until you reminded them of it.
  • Leave at least one favorite out at times. 
  • Don't give them the option of when it happens or how much stuff is rotated.
  • If the toy storage is in the garage, get some plastic totes instead of card board. Mice love plastic and make a mess anywhere they call home. 
  • Don't have a set schedule of when you do the rotation. Do it based on need or for stay at home parents for sanity.We tend to swap them more frequently in winter due to the time they spend inside playing  being much higher that time of year.
  • If it's world ending to do swap out all the toys, try doing a box or two every few weeks.
Our play area is still a disaster some days but nowhere near as bad as it would be with out switching out toys. Find what works for your family but I can promise it's worth the effort. The kids now love when we rotate because it's like having new toys.


Wednesday, December 11, 2013

Make Your Own Wreath


Tis the Season for Wreaths, so why buy one pre-made when you can make one that will be uniquely yours. With just a few items from the store or gun range you can make your front door stand out from the neighbors. The first wreath was made last year using a plain wreath and spent shot shells. The second was made with a length of garland purchase at Wally World. I feel kinda silly even posting about this because it's so simple and easy. The fact that I hadn't done either of these til the last 2 years says to me that while easy it might not come as an idea to some including myself. So pardon my lacking of detailed instructions because there really isn't much to it.


Shotgun Shell Wreath
Add caption

  
Items Needed
  •  Spent shot shells of varying color. Winchester typically uses red shell, Remington typically green. Different gauge shells also adds to the look
  •  Hot Glue Gun and Glue
  • One bare wreath

Directions

  1. Go Shooting with some buddies and save all your shells.
  2. Glue Shells to wreath. That's it, no need to over think this folks just shoot then glue. The order however is pretty important. I wouldn't recommend glue then shoot.

Traditional Wreath

We made the wreath below with a $2.00 section of garland I purchased at Wally World. My wife and daughter made some felt ornaments for it as well. The wreath was made by making a circle the size we wanted the wrapping the remaining section of garland around the circle. Add your own decorations like mini candy canes or ornaments


Monday, December 2, 2013

Hidden History at Folsom Lake


For those of use that were not around before 1955 what lies beneath the waters of Folsom Lake is mystery. The Folsom Dam was finished in 1955 and with it's completion miles of river were lost as were the historical sites that now are part of Folsom Lake. The lake is currently at only 25% of capacity and that has exposed many areas that are typically well under the surface.  Some of the sites include the former town of Mormon Island, the original Salmon Falls Bridge and the dam site of a dam dating to the 1860's.

Old Salmon Falls Bridge
We set out for the Old Salmon Falls bridge after parking off of Salmon Falls Road at Falcon Crest. I'm cheap and the 10 minutes of additional walking is well worth avoiding a $10 day use fee. After parking the car walk into the day use area and the bridge will become visible. Don't try to find a trail, it's usually underwater so you can probably figure out why there isn't one. We pretended to be walking under water, and the girls loved the wide open space to explore.  On our way we passed old foundations and crossed a creek running towards the river. We really just scratched the surface of what is out there to find a see.
Foundation at Salmon Falls 1918

Once we reached the bridge the girls explored some more and enjoyed the nice set that an old abutment made. Having never seen this section of river before it became a lake it was very neat. It's unfortunate that the lake is this low but it provided a very cool place to walk around and explore. Unfortunately it seems that these sites are exposed and accessible more than they used to be. While it may not be good for boating it's great for hiking. I hope to make it back for some more exploring before the lake covers them once again you should too.
Walking across the bridge


Monday, November 25, 2013

Garlic Cheese Biscuits

With Thanksgiving just a few days away I could post a cute craft for the table but instead I present to you Garlic Cheese Biscuits. This recipe is one I made by altering a standard baking powder recipe. They will turn out to be very similar to the addictive ones severed at a certain seafood chain that sounds like Led Robster. So instead of bringing store bought bread or heat and serve dinner rolls bring these and I promise they will impress. In addition to being extremely tasty they are very simple to make and require no special ingredients that one can never find at a grocery store. As with any recipe involving seasonings feel free to alter to your liking.

McKenna Family Garlic Cheese Biscuits
These are always a hit
  
Biscuit Ingredients (makes 12)
  • 2 cups all-purpose flour
  • 2 teaspoons baking powder
  • 4  tablespoons butter (cold)
  • 1/2 teaspoon salt
  • 1 cup Colby Jack cheese (any mild orange cheese will work)
  • 1 tablespoon garlic powder
  • 3/4 cup milk  (whole works best if you have it)
Butter Topping Ingredients
  • 4 tablespoons butter
  • 1/2 tablespoon parsley
  • 1/2 tablespoon garlic powder
  • 1 tablespoon kosher salt for sprinkling (sea salt would also work)
No need to a rolling pin or biscuit cutter
Directions 
  • Combine flour, salt, baking powder, garlic powder and mix thoroughly.
  • Cut butter into small pieces and then work into flour/season mix by hand.
  • Add cheese then mix thoroughly.
  • Pour in milk the work dough by hand until a soft shaggy dough if formed.
  • Pull apart into 12 pieces and place on a greased or non-stick pan and bake at 400 deg. for 12-14 min.
  • Make your topping while the biscuits bake as follows; melt 4 tablespoons butter then add the garlic and parsley and mix.
  • Once biscuits are baked use a basting brush to add the melted butter to the tops of the biscuits. Just a brush or two on each will do.
  • Sprinkle with a small amount of kosher salt. As always with kosher salt a little goes a long way.
  • Serve warm and enjoy!

Homemade Stew and Garlic Cheese Biscuits, Good Eats!


Tuesday, November 19, 2013

Turkey Time

It's the middle of November so let's talk turkey. I'm certain every stay at home blogger or pintrest contributor will have a similar post so here is our versions of some holiday classics. Like I said i'm sure you have all seen these before so while these may not be new lets hope there a bit different than the norm and you pick up a couple ideas.

No-Paint Turkey Hands
 
The no-paint idea is simply dad's way of avoiding the mess that hand paints bring. Instead of the usual paint on the palm and fingers we traced with crayons of different colors. Same cute turkey, without the mess. All you will need is crayons, white paper and someone's hand.


Construction Paper Turkey
 
As with the hand turkey this is a minimal mess craft. Some construction paper and a pair of scissors is all you really need for this one.  Trace out the desired shape of your turkey as well as the hands of the feather donor. Adults can just use there imaginations with the feathers. Make a beak with the scraps and glue to your turkey body.  The lack of instructions is intentional it's a turkey and were all adults here.

Feel free to add colored eyes, it's less creepy that way

Monday, November 4, 2013

Puree Those Pumpkins


Now that all the trick or treating is done what to do with all those pumpkins. Well believe it or not pumpkin puree is actually made from pumpkins and you can in fact make it. Now most people might think this sounds crazy but its very simple. Not quite as easy a opening a can of orange goo labeled pumpkin filling but easy none the less.


Don't toss them, bake them
First you will need to cut open and clean those pumpkins. You can use your jack-o-lanterns if you like since there already clean. Just make sure the bugs haven't gotten to then and there still firm. I will typically quarter the smaller ones and the bigger ones just cut into pieces. You will also find that cleaning is much easier when the pumpkin is in pieces.

Once you have cleaned out you pumpkins, place onto a clean cookie sheet skin side down. Place in a oven that has been heated to 350 degrees. Bake for about one hour or until the skin can be peeled off easily.
Quartered and clean, ready for the oven

Allow to cool then peel the skin by hand or use a knife to cut off the skin. Next cut your baked pumpkin into pieces and place into a rotating cutting device of  your choosing.  Blender, food processor or whatever else might do the job. Once its puree it doesn't really matter how it go there.  All pumpkins are different so you may need to add water to get the correct consistency. Semi-liquid would be the best way I could describe the texture.

Food Processor, Blender or Juicer all will work
That's it, your fresh puree is now ready for your favorite pumpkin recipes. Use instead of the canned garbage in pie, bread or whatever pumpkin treats fit your fancy. A favorite around our house is pumpkin bread. It's similar to zucchini bread in texture and ease of making.

Puree Goodness
This recipe comes from Simply Recipes .


Pumpkin Bread Recipe (makes one loaf)

Ingredients
  • 1 1/2 cups flour
  • 1/2 teaspoon of salt
  • 1 cup sugar
  • 1 teaspoon baking soda
  • 1 cup olive oil
  •  1 cup pumpkin purée
  • 2 eggs, beaten
  • 1/4 cup water
  • 1/2 teaspoon nutmeg
  • 1/2 teaspoon cinnamon
  • 1/2 teaspoon allspice
  • 1/2 cup  chopped walnuts (optional)

Directions

1 Preheat oven to 350°F (180°C). Sift together the flour, salt, sugar, and baking soda.
2 Mix the pumpkin, oil, eggs, 1/4 cup of water, and spices together, then combine with the dry ingredients, but do not mix too thoroughly. Stir in the nuts.
3 Pour into a well-buttered 9x5x3 inch loaf pan. Bake 50-60 minutes until a thin skewer poked in the very center of the loaf comes out clean. Turn out of the pan and let cool on a rack.
Can easily double the recipe.

Monday, October 28, 2013

Stained Leaf Craft

By now your yard is probably covered in leaves. No yard, no problem your neighbors or that shopping center down the street will have plenty. They won't even mind if you pick up a couple, promise. This craft turned out to be one of my favorites that we have done. It's pretty amazing what a few leaves and some melted crayons can look like when placed on a window. Our house only has one type of leaf that would work for this craft so we made a scavenger hunt out of it. It really isn't much of a scavenger hunt but that sound better than look for "dead leaves" and it will make more fun for the kids. After you have collected all of your leaves we are ready to start.


Stained Leaves

Items Needed
  • Crayons (broken bits work just fine)
  • Wax paper
  • Construction paper
  • Leaves
  • Iron
  • Old shirt or clean rag
  • Scissors
  • Glue

  1. Smash, shave or destroy your crayons in one way or another. The smaller the pieces the better.
  2. Cut 2 pieces of wax paper. Make about the lenght of the construction paper.
  3. Lay out the leaves on the wax paper.
  4. Sprinkle your crayon shavings onto the leaves and the paper.
  5.  Cover with wax paper. 
  6. Cover top and bottom surface of the wax paper with the old shirt or rag. I will get hot and the crayon will leak through a bit. 
  7. Iron the wax paper until the crayons are melted and the wax paper is sealed together. If you look closely at the wax paper it will be pretty clear where it has melted together and sealed properly.
  8. Allow to cool the cut out you edging from the construction paper.
  9. Glue your edges around the border and trim wax paper if needed.
  10. Tape to any sun exposed window and enjoy.

Tuesday, October 22, 2013

Pretzel Pumpkins and Boa Vista Orchards

As most that read this blog have figured out we like to make treats at our house. These are some of the easiest treats you can make. Most of ours did not really end up looking like pumpkins as my daughter Kaelin made all but a few by herself. They are something that anyone over the age of about 3 can do by themselves and that makes a perfect project for when Mom or Dad are busy making dinner. You can also add other candies if you chose to.

Items Needed

  • Orange Food Coloring
  • White Almond Bark
  • Small Pretzels 
  • Green M&M's

Directions

  1. Separate the green M&M's from the rest of them. Set aside.
  2. Melt almond bark
  3. Color to desired level of orange
  4. Dip the pretzel in the almond bark until fully covered
  5. Add the green M&M as the stem
  6. Allow to cool
Add caption    

Boa Vista Orchards
 
October not only means Halloween and changing leaves it's Apple Hill season.We live close enough to make weekly trips for produce and a picnic. While most do not have the luxury of living 10 minutes away so a weekly visit will be excessive for most. My usual go to is Boa Vista Orchards. This is not to say it's the biggest or the best as there are many farms and orchards in the Apple Hill area, each filling a unique niche. There are some where you pick your own, others with hay rides, some have large craft exhibits others are only produce. 

Boa Vista is a favorite of ours for it's convenience. It is one of the closest to Placerville and is very easy to get in and out of. There are several craft booths if that's your thing as well as a small deli with lunch items. The store is open year round with local produce and stocks everything people have grown accustomed to at Apple Hill. Carmel Apples, doughnuts, pies and cider are among all the yummy goodness you will find. 

Our girls love picnic time at Boa Vista. They have a nice picnic area across from the store located next to the pumpkin patch. Thankfully Kaelin and Leah enjoy the simple things, picking their own apples is a big deal and they always look forward to it.  Week days are much better for visiting than the weekends but if that's not possible pack a lunch and make the best of it.

Helpful Apple Hill Links

Sunday, October 13, 2013

1 year Breadiversary

I love bread. To those that know me well this comes as no surprise. I love all types of breads,wither its sweet bread with apple cinnamon filling, biscuits, challah or sourdough and most everything in between. A couple of years ago my wife bought a sourdough starter pack to see if she could make my most favorite bread. Our first starter lasted many months and we found that homemade sourdough could was quite tasty.

After moving to the hills last year I decided one day that we should try to make our bread at home. I started with a breadmaker my parents hadn't used in ages. This was short lived however, I found myself frustrated by the lack of variety in bread machine recipes and started making our breads from scratch.  We decided very early to attempt not to purchase any bread from the grocery store. One year later I can proudly say WE did it. While I make most of our bread my wife has certainly helped in this.

There are many reasons why one might attempt this. Homemade bread is much healthier than mass produced and for this reason alone it's a great idea. There is nothing that goes into our bread that I can't say or spell(please don't test the spelling part). It does go stale quicker but I feel that's a small price to pay for the quality of food your consuming. Cost is another reason, as a single income family we save money where we can and this is great way so save money. A loaf of wheat bread at the grocery store can be $4. I can make a loaf of wheat bread for less than $.50. It doesn't take very long for it too add up. Quality is the pleasant bonus to the cost and healthy factors. Nothing beats the taste or smell of fresh baked bread wither its garlic bread for pasta or burger buns for some BBQ.

I didn't write this post with the intention of bragging. It's more of a challenge. If your reading this you have the ability to make bread, promise. You don't have to give up buying bread at the store but you might want to after trying it. Before you say I don't have time know this, most breads only take 15-20 mins to make the dough and only require 1-2 hours rise time. Half of the dough time involve no work while you can gather the other ingredients. Rising takes no effort at all, the yeast does the work for you.
 
Below is a recipe out of my favorite bread book The Bread Bible . This recipe is for French Bread and I believe it is one of  the best breads for a beginner. It requires very few ingredients and tastes very, very good. Try with garlic butter for some homemade garlic bread the next time you have pasta.

A few general bread making tips to get you started 
  • Try to avoid instant yeast if making by hand. It is intended for bread machines.
  • Don't forget the butter in the microwave. I've made this mistake more times than I care to     admit.
  • Buy your yeast in bulk. Small packets of yeast may be convenient but they are also very costly per unit. We use Red Star from Amazon for $9 per 2 pound bag.
  • Learn you kneads. Wheat bread responds differently to kneading than Hamburger Buns. Don't expect them to feel the same and learn what if feels like when its properly kneaded.
  • Involve your kids. They can measure, pour, stir and even help you knead.
  • Don't be scared, it's only bread.
  • If at first you don't succeed, try again.
French Bread

 Makes 2 large Baguettes or several Sandwich Rolls

2 cups warm water (105-115 deg)
1 1/2 tablespoons active dry yeast
1 Tablespoon sugar
3 cups bread flour
1 tablespoon salt
About 3 cups unbleached four

Egg Glaze (optional)
1 large beaten egg
2 teaspoons water
  1. In a large bowl using a whisk pour in the warm water and sprinkle the yeast and sugar over the surface of the water. Stir until combined . Let sit until dissolved and foamy, about 10 mins.
  2. Add 2 cups of bread flour and the salt. Beat hard until smooth. Add the remaining cup of bread flour and most of the all purpose flour , 1/2 cup at a time, until a shaggy dough that clears the bowl is formed.
  3. Turn the dough onto a lightly surfaced work surface and knead until soft silky and resilient, 5-8 min, dusting with flour as needed to prevent sticking. The finished dough should not be sticky
  4. Place the dough into a lightly greased bowl (veg. oil works very well). Turn once to coat the top and loosely cover with plastic wrap. Let rise in a cool area until tripled in bulk. If time allows you can "punch down or deflate" and let rise again for 1 hour.
  5. Gently deflate the dough and form your rolls of baguettes. Cut the tops of the loafs no more than 1/4 in deep every few inches.
  6. Directly after forming apply glaze if desired and place on the middle rack of cold oven. Turn oven on to 400 deg and bake for 35-40 min or until crusty and loaves sound hollow when tapped.
  7. Serve warm and enjoy! 

Note: These directions above are the basic version of the recipe. You can let rise a second time(30-40min) before baking if you chose the bake a 400 deg  until crusty. You can also apply a second coat of glaze halfway through if you desire a heavily glazed bread. Only 2 of you, cut in half for one good sized baguette.

Tuesday, October 8, 2013

Coffee Can-O-Lantern

As promised I have another Halloween craft for everyone to try. This one will be far easier than the door hanger project. The idea can to me one morning after I found myself with yet another empty coffee can and an overly excited 4 year old. It reminded me of going to my Grandparents house on Halloween and blowing out the candles on all the luminaries that they would light for the neighborhood kids. Grandma and Grandpa may not have had the best candy but, they did have tons of candles to blow out.

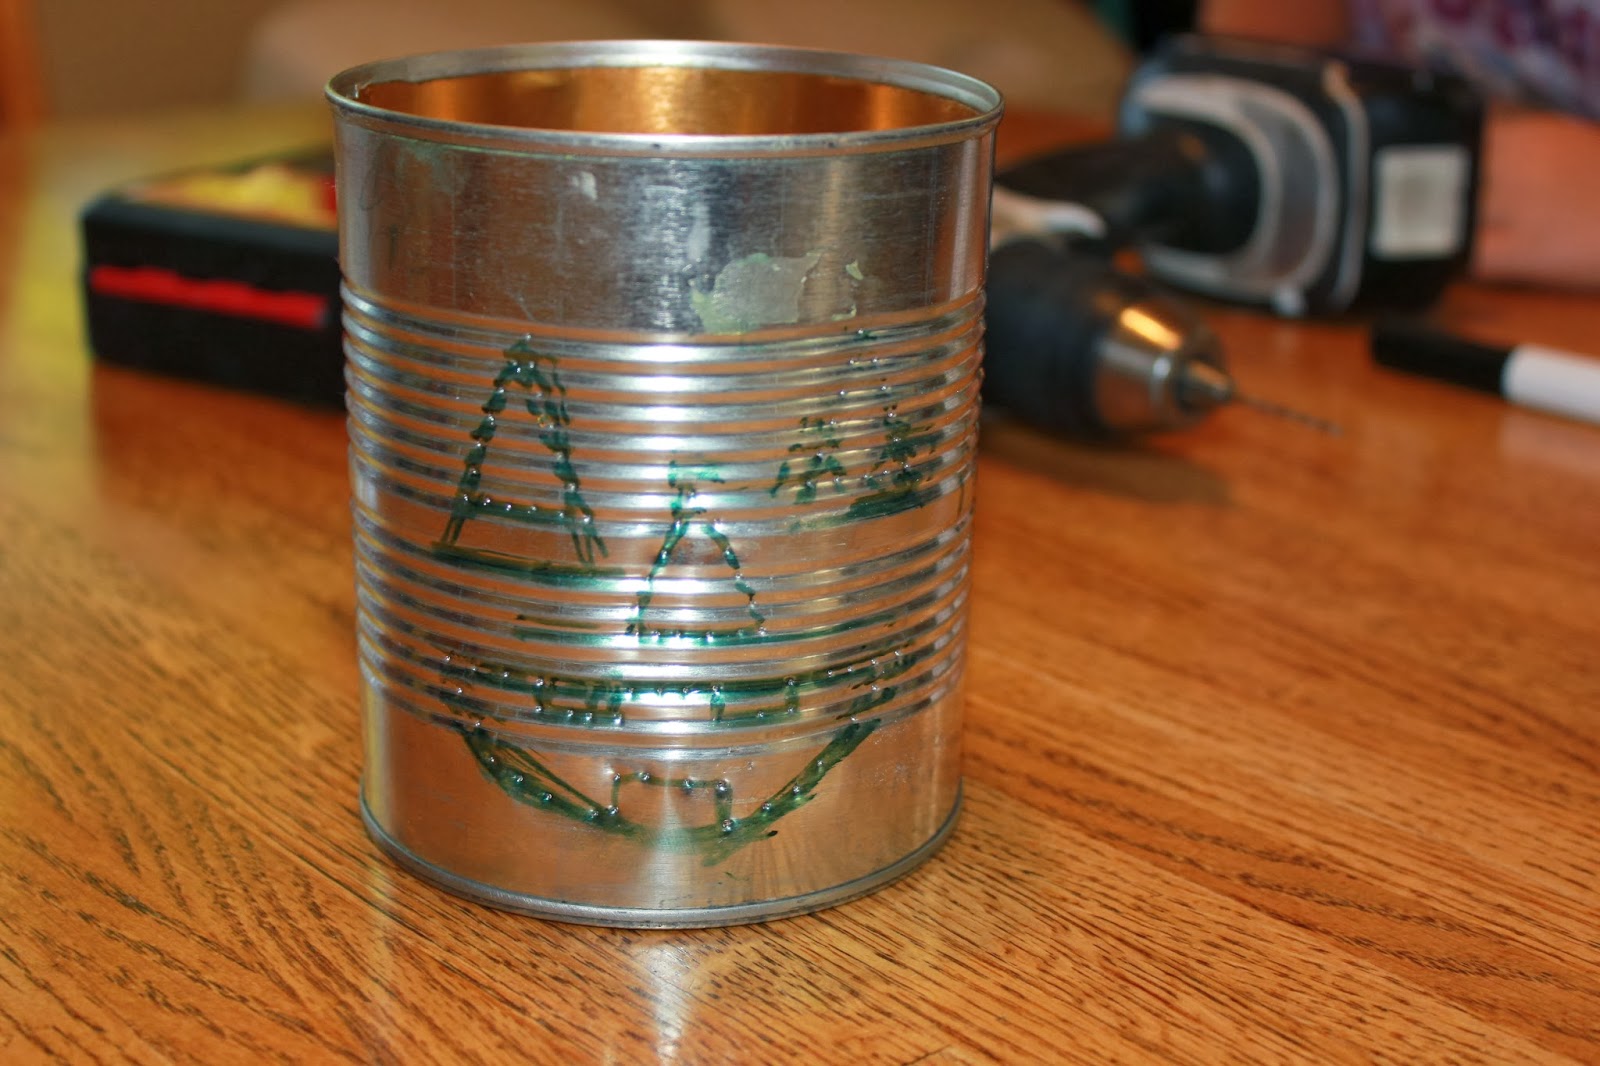
This memory fueled little craft will be coffee can jack-o-lanterns. These can be made with a standard metal coffee can or if your the Starbucks kind(your wasting your money) you can use cleaned canned food cans. We used 28 oz tomato cans for the small ones shown. This can be done on a cool fall morning and be done in time to light the same night. Our oldest absolutely loved this project, she got to draw her own design and with my help she drilled the holes. Dad's (or Mom's) this is a great opportunity to teach your kids about how a drill functions as well as another opportunity to drive home that tools are not toys. This is especially important with sharp tools like drills or if your a former mechanic with more tools at home than any normal homeowner could ever need. Don't have a drill, well does your dad, grandpa or neighbor? If they do ask to borrow and make them one as a thank you. As a guy that loans tools occasionally I think more kids need shown how to return tools in a timely manner anyway. Still no luck? Fear not, you could get by with a hammer and a punch or screwdriver to make your holes. That should just about cover any possible excuse you could think of not to do this.

Items Needed
  • Tin Cans
  • Primer, Orange Paint
  • Drill and Drill Bits
  • Marker
  • Candles
  • Metal Polish (optional)
  • Center Punch (optional)

Lets Pluck This Chicken

1. Prep and clean your cans. Make sure all the food product is out and no sharp edges are exposed.
Only need a few tools for this project

2. Draw your design on the can.

Our Artist at work
3. If you have an available center punch use it to punch out the design. This will make drilling the holes     much easier.

With a little help from dad it's ready for the drill
4. Drill out the design. We used a 5/64th drill bit. Any bit under 1/8th inch should work fine.

5. Paint, apply primer first for ease of painting. Do not paint the inside of the cans as you need the     
    shinny finish to reflex the light of the candle. A toothpick will help clean out paint from the holes 
    during painting.

Mom helps with the painting


 6. Light and enjoy the your hard work. Not enough light coming out? Try pollishing the inside of   
     the can with some metal polish.
Dads, Dad and Kaelins, Kaelin and Moms on display


We Play For October......

I will freely admit that I have a problem. Every October I watch an unhealthy amount of baseball. This is quite a feat due to the fact I watch or listen too most A's games and a quite a few other games every week. This only gets worse because of the playoffs. My issue isn't that my pants fit tighter or my couch gets worn, it those damned ads. It seems that the advertising executives at MLB, Chevrolet, and Budweiser only make one ad for the entire playoffs. Every commercial break its the same ads for and entire month and while it may drive me nuts my kids certainly take note of them. For the last 2 years Kaelin has know October as Chebie Twuck Month. She thinks that Stevie Wonder is a singer for Bud-Light ads. And now she is walking around our house in a semi-serious voice telling me "we play for October". Oh the power of marketing. I guess this could all be prevented if I just turned off the TV and read about the games the next day but since that will never happen i'll keep dancing to Bud-Light ads during Chevy Truck month while we all play for October.

Wednesday, October 2, 2013

Jack-O-Lantern Door Hanger


It's that time of year. The weather is cooler, the leaves are turning and most importantly playoff baseball. All this can only mean it's fall and time to start getting ready for Halloween.  Over the course of the next couple posts I'll show some crafts ranging from slightly difficult and time consuming to some that take only minutes. We have spent minimal money creating all of these out of stuff we had around the house. The door hanger cost less than $1 since I had everything else needed already. I'm starting with the hardest because it does take some time to do. Once done the results were great, and my wife whom is a closet trinket lover was very happy to have another seasonal decoration.

The door hanger I'll show you today was more time consuming than difficult. This can be made with any good sized piece of scrap wood you can dig up. Ours was made from a firewood round I had recently cut in the forest. I cut an evenish round approx 1in thick. Now the thickness is not terribly important and neither is the size. You will see no dimensional measurements on this guide. Last time I saw a pumpkin patch no two were alike so make yours whatever shape fits you fancy. There are many steps that the kids can help with. Our 4 year old helped with the sanding and painting.

Items needed
  • 1 Piece of scrap wood  (14x14 might be the smallest you want but i promised no measurements)
  • Orange paint
  • Black paint
  • Spray sealant (enamel or lacquer)
  • Wire (coat hanger will work if that's all you have)
  • 2 eyelet hooks
  • Masking tape
Tools needed
  • Jigsaw
  • Sander, hand sanding will also work 
  • C clamps
  • Pencil
Let Get Started
  • Draw out the design you intend to cut. I would suggest pencil instead of pen. We did not use any pattern and don't forget the stem. 
  • Cut out your pattern with a jigsaw. Use a fine saw blade if possible
     
  • Shape and sand. If you have a wood rasp you can shape further at this point, flatten high spots and get those curves just like you want. Since ours was cut with a chainsaw it took quite a bit of sanding to get smooth. Commercially cut wood will be far easier.
  • Paint the background color and stem
  • Mask off entire pumpkin then cut out the face
  • Paint the cut out section and let dry
  • Remove masking tape

  • Finish with protective coating
  • Add eyelets to the top and string wire between
  • Hang on door and await the accolades


Tuesday, September 24, 2013

Pinnacles National Park

So new as a National Park it still has many Monument signs
As a family we like to camp so given that fact that money is tight on one income our vacations often involve camping. It took me many years to realize that was why we camped as children, I just thought my parents really liked it.  We don't have a traditional spot we go to every year instead we try to visit a new National Park every year. Living in the west we are blessed with an abundance of natural beauty within driving distance. We are starting to run out of new parks in California and we needed something within a few hours. We learned a hard lesson taking an 18 month old on a 9 hour drive to Death Valley. Our choice was Pinnacles National Park which lies approximately 45min south of Hollister Ca.

Pinnacles NP is the countries newest National Park. However it has been in the National Parks system for over 100 years as a National Monument. The parks two main attractions are the rock spires and outcroppings formed from an ancient volcanic field and the other is the Talus caves. The Caves are some of the largest Talus Caves in the world .A Talus Cave is not a cave in the traditional sense it is a cave formed by boulders falling a narrow canyon and sealing the top. Some other attractions of the park are the 30+ California Condors which was reintroduced into the parks in 2003. It is also a climbers paradise and much of the park has hiking trails specifically for climbing access.

We chose to go the week after the Labor Day holiday. Last year we discovered that nobody camps that week. It is really quite nice, the weather is still good and the summer crowds are gone. After the kids start school that will go away but for now we love it. We arrived at Pinnacles mid afternoon and found the park empty. The park has 134 camp sites and 5 were occupied the night we stayed. The park is split due to the lack of a road connecting the east and west sides. The campgrounds have flush toilets and showers for those of you who prefer those amenities. An added perk was a swimming pool, the park has no lake or river for cooling off so they have a very nice swimming pool.  Our girls were very pleased to be able to play in the pool after driving all day. On an evening walk we got to seem many deer, rabbits and quite a few bats.

Inside the Caves
We hiked the next morning to the Bear Gulch Caves. It took a little convincing to get Kaelin into them but once in she loved it. There were several times we had to take Leah out of the kid carrier due to low clearance. The hike to the cave was uphill but not difficult and most little kids should be able to make it.  The caves are also home to an endangered species of frog which seemed to us to be quite plentiful given the high numbers we were able to see.  We exited the cave and were able to see a small portion of the rock formations from Bear Gulch Reservoir. We headed back to the truck for our picnic and for Kaelin to complete her Jr. Ranger worksheet. She left the ranger station with a giant smile, new badge and even a patch for her efforts.
Snug fit at times

At this point we headed out to finish the rest of our road trip. We spent several hours on Hwy 1 trying to figure out why exactly Teddy Roosevelt had found it so special. This isn't meant to be a knock on the park it's just that we get spoiled with places like Yosemite and Death Valley. Not every park can be that awe-inspiring but we were a little underwhelmed. We decided that we really needed to see the other side of the park before we passed judgement.  So on our way home from the coast we did just that and checked out the park from the West Entrance.

Being such a small park it would be easier to hike from one side of the park than to drive it. Our kids prevented that hike from happening so we drove in from the west. This entrance has a brand new visitors center and provided a much better view of the formations. We attempted a to hike further into the park to check out some of the cooler formations but after fighting the kids for 10 mins we called it a day. The west end seems much closer to the bigger formations in the park as well as a chance to see the condor.

Rock formations from the West Side Visitors Center
We left still slightly puzzled as to why Teddy felt the need but it was still worthwhile. It is unlike anything else in the area and seems more like a scene out of the desert than on the coast. We will return without the kids to do some hiking and explore some more of the park and I would recommend anyone checking it out. We both felt strange not being completely in awe and while that might not speak well of Pinnacles it goes to show how spoiled we are being so close to so much extraordinarily beautiful country.
Bear Gulch Res.